Mastering the Art of Homemade Crescent Rolls: Techniques for Flawless Fluffiness
There's an undeniable magic in the aroma of freshly baked bread, and when that aroma comes from a batch of homemade crescent rolls, it's pure culinary bliss. While the concept of making these flaky, buttery delights from scratch might seem daunting, it's a deeply rewarding experience that elevates any meal. This article, building upon the foundational knowledge you might have gained from exploring a classic recipe, delves deeper into the techniques, tips, and tricks that transform a good crescent roll into an absolutely unforgettable one. We'll explore the nuances of dough preparation, the precision of shaping, and the secrets to achieving that perfect golden-brown crust and pillowy interior that makes homemade crescent rolls a true masterpiece.
The Heart of the Roll: Perfecting Your Dough
The journey to an exquisite crescent roll begins and ends with the dough. It’s a living thing, responding to its environment and your touch. Understanding its temperament is key to success. For a comprehensive guide on basic ingredients and their roles, refer to our foundational article on homemade crescent rolls - Article 1. Here, we focus on refinement.
- Quality Ingredients Matter: While a recipe might list "flour" and "butter," the quality of these components significantly impacts the final product.
- Flour: Opt for unbleached all-purpose flour for a good balance of protein and softness. If you want a slightly chewier roll, a bread flour can be mixed in.
- Yeast: Ensure your yeast is fresh and active. Proofing it in warm milk (around 105-115°F or 40-46°C) with a pinch of sugar before adding to other ingredients is a fail-safe method. If it doesn't foam, your yeast is likely dead.
- Butter: Use high-quality unsalted butter. European-style butters, with their higher fat content, can yield even flakier results. Ensure it's softened, but not melted, for optimal incorporation.
- Kneading for Structure: Kneading develops the gluten in the flour, which gives the rolls their structure and chewiness.
- By Hand: Knead on a lightly floured surface for 8-10 minutes until the dough is smooth, elastic, and no longer sticky.
- Stand Mixer: Use the dough hook attachment on medium speed for 5-7 minutes. The dough should pull away from the sides of the bowl.
- The Windowpane Test: A great indicator of well-kneaded dough. Pinch off a small piece of dough and gently stretch it. If you can stretch it thin enough to see light through it without tearing, your gluten is perfectly developed.
- First Proofing: The Rise to Greatness: This initial rise allows the yeast to ferment, creating air pockets and flavor.
- Ideal Environment: A warm, draft-free place is crucial. An oven with just the light on, or a microwave (turned off!) with a bowl of hot water, creates a perfect environment.
- Visual Cues: The dough should double in size, typically taking 1-1.5 hours, depending on room temperature and yeast activity. It should feel puffy and soft.
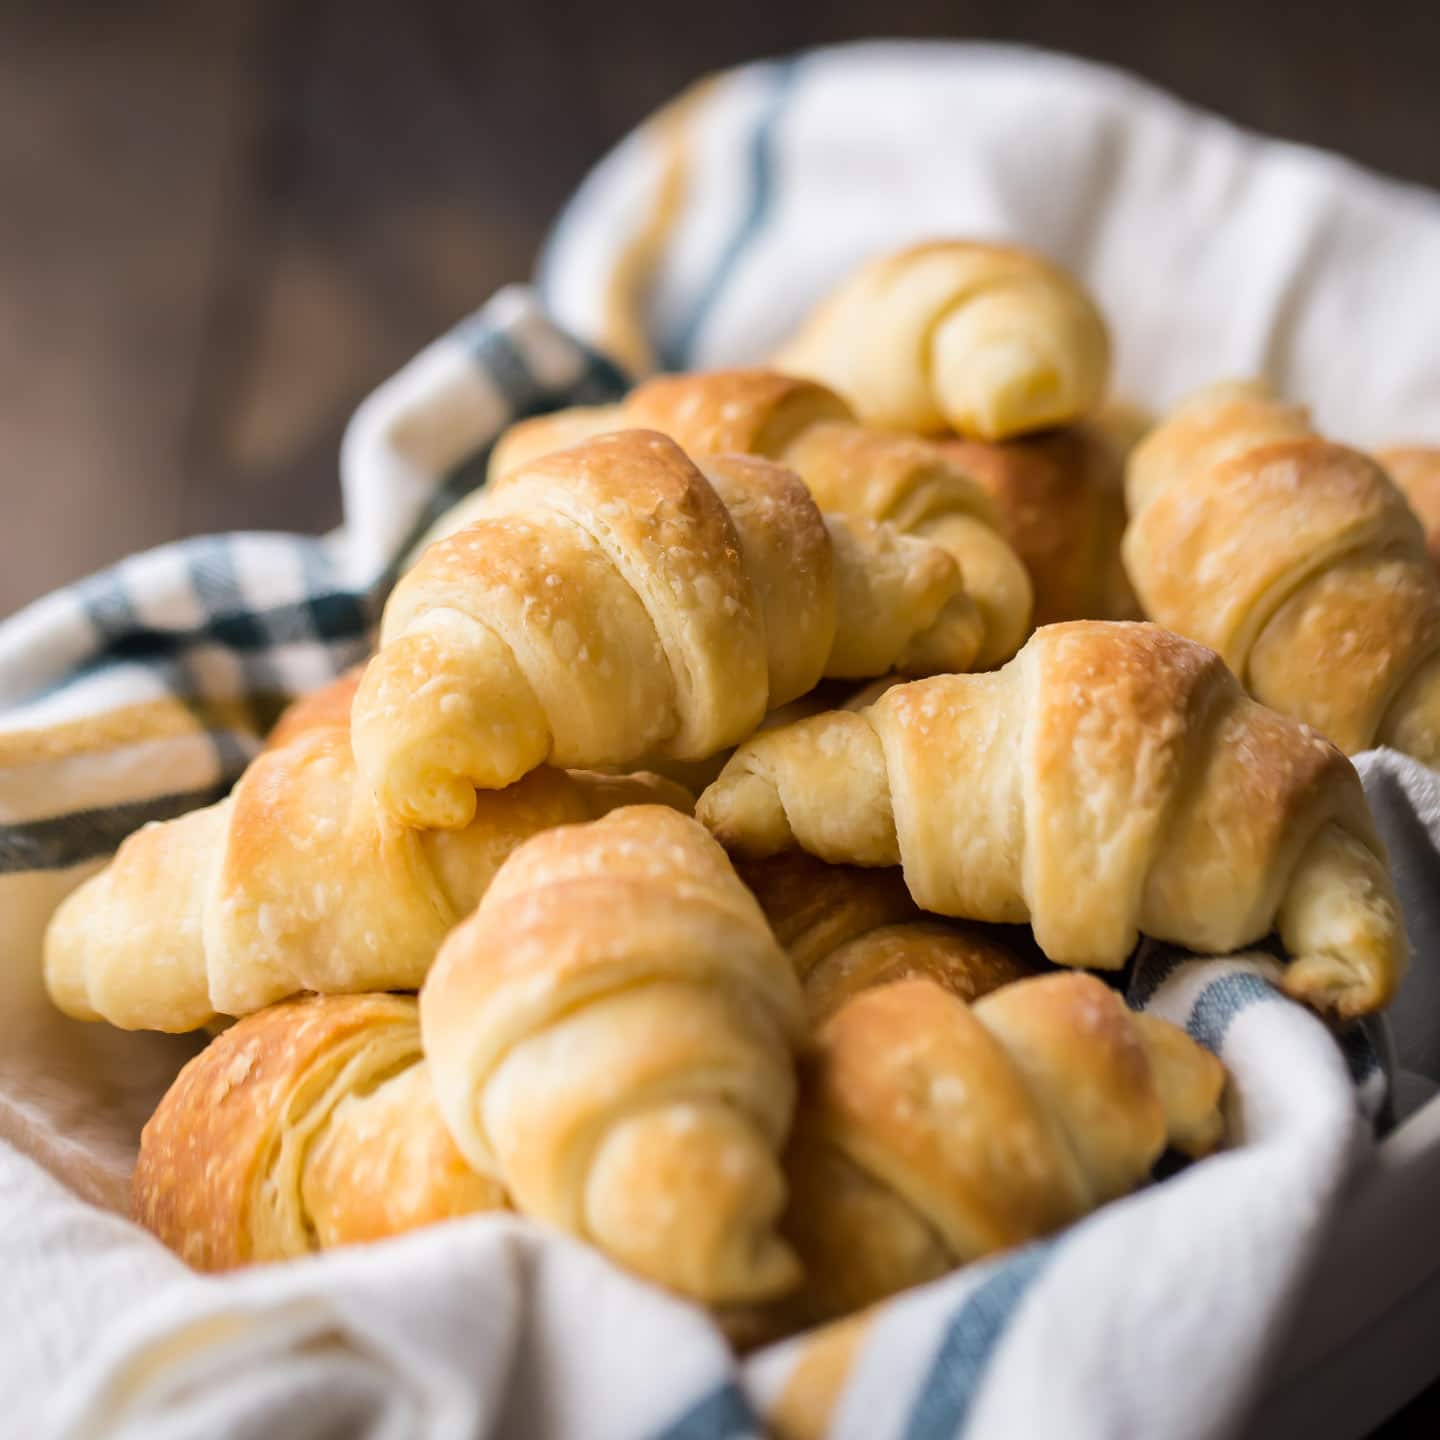
The Art of Shaping Your Homemade Crescent Rolls: Crafting the Perfect Form
Once your dough has completed its first proof, the next exciting step is shaping. This is where your homemade crescent rolls truly begin to take form. Precision here contributes to even baking and that classic crescent appearance.
- Deflating and Dividing: Gently punch down the risen dough to release the air. Turn it out onto a lightly floured surface. For uniform rolls, you can weigh the dough and divide it into equal portions. A common method is to divide the dough into two equal halves, then roll each half into a circle.
- Rolling Out Evenly: The key to consistent rolls is an evenly rolled-out dough.
- Roll each dough portion into a large circle, about 1/4 inch thick. Aim for a perfect circle, but don't fret if it's not absolutely flawless – it will still taste delicious!
- Use a ruler or your hands to check for even thickness across the entire circle. This ensures all parts of the roll bake at the same rate.
- Cutting the Triangles:
- Using a pizza cutter or a sharp knife, cut the circle into even triangles. For standard-sized rolls, cut into 12-16 triangles. Start by cutting the circle in half, then into quarters, then eighths, and finally dividing each eighth into two.
- The base of each triangle should be about 3-4 inches wide.
- The Rolling Technique: This is where the crescent shape comes to life.
- Starting from the wide base of each triangle, gently roll the dough towards the narrow tip.
- Roll fairly tightly, but don't compress the dough too much, as this can inhibit rise.
- Once rolled, gently curve the ends inward to form the classic crescent shape.
- Place the shaped rolls seam-side down on a baking sheet lined with parchment paper, leaving enough space between them for expansion during the second proof and baking.
- Second Proofing: The Final Rise: This is a shorter rise that allows the rolls to become light and airy before baking.
- Cover the shaped rolls loosely with plastic wrap or a clean kitchen towel.
- Let them rise in a warm place for about 30-45 minutes, or until noticeably puffy and slightly larger. They shouldn't double in size like the first rise, but they should look soft and plump.
Baking Your Homemade Crescent Rolls to Golden Perfection
The moment of truth arrives when your perfectly proofed homemade crescent rolls enter the oven. The right temperature and timing are crucial for achieving that irresistible golden crust and tender interior.
- Preheating is Paramount: Always preheat your oven thoroughly. A common temperature for crescent rolls is 375°F (190°C). Allow at least 15-20 minutes for the oven to reach and stabilize at the desired temperature. An accurately preheated oven ensures an initial burst of heat that helps the rolls rise quickly and evenly.
- The Egg Wash or Butter Brush: For a beautiful golden sheen and slightly crispy crust, consider an egg wash or butter brush:
- Egg Wash: Whisk one egg with a tablespoon of water or milk. Gently brush over the tops of the rolls just before baking. This provides a deep, glossy finish.
- Melted Butter: Alternatively, brush with melted butter for a softer crust and rich flavor. This can be done before or immediately after baking.
- Baking Time and Visual Cues:
- Bake for 12-18 minutes, depending on your oven and the size of your rolls.
- The rolls are done when they are deeply golden brown on top and the bottoms are also browned. If they are browning too quickly, you can loosely tent them with foil.
- If you have a digital thermometer, the internal temperature should reach about 200-210°F (93-99°C).
- Cooling: Transfer the baked rolls to a wire rack immediately to prevent the bottoms from becoming soggy. While they are best enjoyed warm, allowing them to cool slightly helps to set their structure.
Elevating Your Homemade Crescent Rolls: Creative Twists and Make-Ahead Magic
Once you've mastered the basic technique for homemade crescent rolls, the possibilities for customization are endless. Experimentation is part of the joy of home baking!
Savory Variations:
- Herbed Garlic Butter: Before rolling, brush the dough circle with melted garlic butter mixed with finely chopped fresh herbs like parsley, chives, or thyme.
- Cheese-Filled: Place a small cube of cheddar, Gruyere, or a sprinkle of Parmesan at the wide end of the triangle before rolling.
- Everything Bagel Seasoning: After the egg wash, sprinkle the tops with everything bagel seasoning for a delightful savory crunch.
Sweet Indulgences:
- Cinnamon Sugar Swirl: Brush the dough with melted butter and sprinkle generously with cinnamon sugar before rolling.
- Chocolate Hazelnut: Spread a thin layer of chocolate-hazelnut spread (like Nutella) on the dough before rolling.
- Fruit & Cream Cheese: A small dollop of cream cheese mixed with fruit preserves or pie filling can be added at the wide end.
Make-Ahead & Storage Tips:
- Refrigerate Dough: The unbaked dough can be prepared the day before. After the first rise, punch down, cover tightly with plastic wrap, and refrigerate overnight. The next day, let it come to room temperature for 30-60 minutes before shaping and proofing.
- Freeze Unbaked Rolls: Shape the rolls as usual, but instead of the second proof, flash freeze them on a baking sheet until solid. Transfer to a freezer-safe bag for up to 1 month. When ready to bake, place frozen rolls on a baking sheet, cover, and let them thaw and rise in a warm place for 2-4 hours before baking as directed.
- Freeze Baked Rolls: Once completely cooled, baked crescent rolls can be frozen in an airtight container or freezer bag for up to 3 months. Reheat in a 300°F (150°C) oven for 10-15 minutes, or microwave briefly.
For more advanced techniques, troubleshooting guides, and a deeper dive into ingredient science, you can also explore homemade crescent rolls - Article 3.
Conclusion
Creating homemade crescent rolls is a journey that, while requiring a bit of patience and attention to detail, rewards you with an incredibly satisfying and delicious result. From understanding the nuances of dough preparation and mastering the art of shaping, to achieving that perfect golden bake and even venturing into creative variations, each step brings you closer to baking perfection. These tips and techniques are designed to empower you, transforming baking from a chore into a joyous craft. So, don't hesitate to roll up your sleeves, embrace the process, and soon you'll be enjoying the warm, flaky, and utterly delightful homemade crescent rolls that will surely become a staple in your kitchen.
